To implement multifactor authentication with Google Authenticator, we’ll need the open-source Google Authenticator PAM module. PAM stands for “pluggable authentication module” – it’s a way to easily plug different forms of authentication into a Linux system.
Download the required packages:
# apt-get -yy install gcc mercurial libpam0g-dev
Download from google code and compile it
# wget https://google-authenticator.googlecode.com/files/libpam-google-authenticator-1.0-source.tar.bz2
# bunzip2 libpam-google-authenticator-1.0-source.tar.bz2
# tar -xvf libpam-google-authenticator-1.0-source.tar
# cd libpam-google-authenticator-1.0
# make
# make install
run it for the first time
# ./google-authenticator
Do you want authentication tokens to be time-based (y/n) y
https://www.google.com/chart?chs=200×200&chld=M|0&cht=qr&chl=otpauth://totp/harris@www.example.com%3Fsecret%3D TYJ74KP3JJJBDZBG
Your new secret key is: TYJ74KP3JJJBDZBG
Your verification code is 063115
Your emergency scratch codes are:
16481508
19248644
56538567
36737328
68456914
Do you want me to update your “/root/.google_authenticator” file (y/n) y
Do you want to disallow multiple uses of the same authentication
token? This restricts you to one login about every 30s, but it increases
your chances to notice or even prevent man-in-the-middle attacks (y/n) y
By default, tokens are good for 30 seconds and in order to compensate for
possible time-skew between the client and the server, we allow an extra
token before and after the current time. If you experience problems with poor
time synchronization, you can increase the window from its default
size of 1:30min to about 4min. Do you want to do so (y/n) y
If the computer that you are logging into isn’t hardened against brute-force
login attempts, you can enable rate-limiting for the authentication module.
By default, this limits attackers to no more than 3 login attempts every 30s.
Do you want to enable rate-limiting (y/n) y
Google Authenticator will present you with a secret key and several “emergency scratch codes.” Write down the emergency scratch codes somewhere safe – they can only be used one time each, and they’re intended for use if you lose your phone.
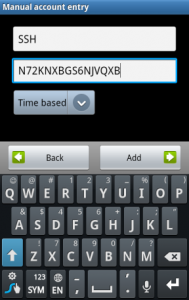
Enter the secret key in the Google Authenticator app on your phone (official apps are available for Android, iOS, and Blackberry. You can also use the scan barcode feature – go to the URL located near the top of the command’s output and you can scan a QR code with your phone’s camera.
You’ll now have a constantly changing verification code on your phone.
Activate google authenticator
Next you’ll have to require Google Authenticator for SSH logins. To do so, open the /etc/pam.d/sshd file on your system (for example, with the sudo nano /etc/pam.d/sshd command) and add the following line to end of the file:
auth required pam_google_authenticator.so
Next, open the /etc/ssh/sshd_config file, locate the ChallengeResponseAuthentication line, and change it to read as follows:
ChallengeResponseAuthentication yes
(If the ChallengeResponseAuthentication line doesn’t already exist, add the above line to the file.)
Finally, restart the SSH server so your changes will take effect:
# service ssh restart
You’ll be prompted for both your password and Google Authenticator code whenever you attempt to log in via SSH.
Just run google-authenticator as the user which you want to enable 2 factor authentication for.


